
12 Easy DIY Home Decor Projects That Look Surprisingly High-End
381 views
There’s a particular kind of frustrating room: everything is clean, the furniture is perfectly usable, and yet the space still looks strangely cheap.
Usually, the problem isn't the sofa. It’s the details.
A bare wall, undersized artwork, mismatched hardware, thin-looking curtains, or a collection of small decorations scattered everywhere can make an otherwise attractive room feel unfinished. The good news? You don't need a designer budget to fix it.
For Room Trends, the best DIY projects are the ones that create visual architecture, improve scale, or make inexpensive materials look intentional. That fits the site's current emphasis on warmer interiors, layered materials, personalization, and practical room upgrades rather than simply chasing trends.
These 12 projects focus on exactly that.
1. Add Picture-Frame Molding to a Plain Wall
Few inexpensive upgrades create as much architectural presence as wall molding.
Picture-frame molding, sometimes called box trim, uses narrow strips of wood or MDF arranged into rectangular frames. It has been used for years to introduce dimension and a more finished architectural appearance without rebuilding the wall.
You don't need complicated carpentry.
Measure the wall, mark the rectangles with painter's tape first, then cut your molding and attach it with construction adhesive and finishing nails. Fill nail holes, caulk the seams, sand lightly, and paint everything the same color as the wall.
That last part matters.
A monochromatic finish tends to make inexpensive trim look far more integrated.
Best pairing: warm beige wall paint, simple furniture, one oversized artwork.
If your ceiling is only 8 or 9 feet high, keep the molding profile relatively slim. Oversized trim can make an average-height room feel awkward rather than luxurious.
2. Turn a Cheap Mirror Into a Statement Piece
A basic frameless mirror can look surprisingly expensive with one simple addition: a custom frame.
Buy inexpensive pine boards or lightweight trim, cut four pieces to size, and create a frame around the existing mirror. A dark walnut stain gives it a furniture-like appearance; painting the frame warm white creates a softer look.
The annoying part is getting the corners right.
If you don't own a miter saw, many hardware stores can make straight or angled cuts for you. Measure twice. Seriously.
For bathrooms, use moisture-resistant materials and adhesives appropriate for humid environments.
A large framed mirror above a console, vanity, or fireplace instantly gives the wall more visual weight.
3. Make Oversized Art From an Ordinary Print
Small artwork often looks inexpensive simply because it's too small.
Instead of buying several tiny pieces, download or create one large abstract print, architectural drawing, botanical image, or monochrome photograph and place it inside a substantial frame.
You can even make the frame yourself from pine boards.
The trick is the matting and scale. A generous border around a modest print can make the artwork feel deliberately curated rather than enlarged for the sake of filling space.
A useful rule: let the artwork relate to the furniture beneath it. A tiny print floating above a wide sofa usually looks disconnected.
For a more sophisticated result, stick to muted colors that connect with existing upholstery, wood, or wall color.
4. Upgrade Cabinet Hardware
This may be the fastest project on the entire list.
Replace dated knobs and pulls on kitchen cabinets, bathroom vanities, dressers, or built-in storage.
Brushed brass, aged bronze, matte black, and warm nickel can dramatically change the character of otherwise ordinary cabinetry.
Before ordering anything, measure the center-to-center distance between existing screw holes. A common mistake is buying attractive handles that don't match the existing hole spacing, turning a five-minute upgrade into a drilling-and-filling project.
Keep the finish consistent throughout the room.
One beautiful handle style repeated 15 times looks intentional. Five different metals usually don't.
5. Create a Faux Built-In With Simple Shelving
Built-ins have a way of making a room look expensive because they appear architectural rather than simply purchased.
You can fake that effect.
Install two or three matching bookcases or shelving units, secure them properly to wall studs, and add a continuous wood top or trim around the installation. Paint the shelves and surrounding trim the same color.
The visual trick is hiding the gaps.
Even a narrow strip of trim along the sides and ceiling can make separate pieces read as one custom installation.
Floating shelves can work too. For example, IKEA's MOSSLANDA picture ledge is only about 12 cm deep and comes in several lengths; the 115 cm version is rated for a maximum load of 7.5 kg, so it works nicely for lightweight art and decorative displays when installed with appropriate wall fasteners.
Don't treat those load ratings casually. Decorative objects are one thing; heavy books, ceramics, or anything valuable require proper anchoring and a shelf designed for the load.
6. Give a Plain Lampshade a Custom Look
Lighting can make inexpensive furniture look better—or expose every cheap-looking surface in the room.
Instead of replacing an entire lamp, change the shade.
A larger linen-look shade can make a basic ceramic, glass, or metal lamp feel substantially more sophisticated. For an even more custom result, add narrow trim around the top and bottom edge.
The proportions matter more than the price.
A tiny shade sitting on a chunky lamp base usually looks accidental. A slightly oversized shade often feels more contemporary and intentional.
Try this on bedside lamps, console lamps, or a pair of matching lamps in the living room.
7. Build a High-End-Looking Tray From Scrap Wood
A decorative tray is one of those small objects that quietly organizes a room.
Make one from a piece of plywood or an old wooden board. Add two cabinet handles or simple wooden rails as handles, sand everything smooth, then stain or paint it.
Use the finished tray on a coffee table with three or four objects: a candle, a small vase, a book, and perhaps a decorative bowl.
That's enough.
The tray creates a visual boundary, which makes several unrelated objects look like one composed arrangement rather than clutter.
8. Frame a TV Wall With Decorative Trim
A television can dominate a living room, particularly when it's mounted against a completely empty wall.
Rather than trying to hide it, give the wall structure.
Install a large rectangular molding frame around the television, or create a wider painted panel behind it. The frame can visually connect the screen with nearby artwork, shelving, or furniture.
Keep the trim simple. Elaborate molding around a modern television can feel forced.
This project also gives you a chance to solve a less glamorous problem: cables. Plan the cable route before installing the trim instead of discovering afterward that the power cord is visible through the center of your new "luxury" feature.
9. Make Curtains Look Custom
Expensive-looking windows often come down to installation rather than expensive fabric.
Hang curtain rods higher and wider than the window itself, then use panels that reach close to the floor. The fabric should generally frame the window rather than stop awkwardly several inches above the floor.
This creates a taller, more finished appearance.
You can also sew or iron a contrasting fabric band onto inexpensive curtains to create a custom border.
No sewing machine? Fusible hem tape can handle many lightweight fabric projects.
Just test it on a hidden section first.
10. Create a Faux Stone or Plaster Accent
Natural stone and hand-finished plaster can be beautiful, but the material and installation costs add up quickly.
A simpler alternative is to create a textured accent using a suitable wall compound or specialty paint system.
Apply the material in thin, irregular layers rather than trying to make the surface perfectly smooth. The objective is subtle variation.
Warm off-white, beige, taupe, and muted clay tones work particularly well with the warmer 2026 interior direction already reflected across Room Trends.
Don't overdo the texture.
A wall that looks like rough concrete from three feet away can quickly become visually exhausting. High-end interiors usually benefit from restraint.
11. Turn a Basic Dresser Into a Designer-Looking Piece
You don't need to build furniture from scratch.
Start with an inexpensive dresser, console, or nightstand with a reasonably simple shape. Remove the hardware, lightly sand the surfaces, repair obvious imperfections, prime where appropriate, and apply a quality furniture paint.
Then add better hardware.
For an extra custom effect, attach thin decorative trim to the drawer fronts before painting them.
The combination is powerful: simple geometry, consistent color, substantial hardware.
Don't skip surface preparation. Paint applied over greasy kitchen residue or glossy laminate without suitable preparation tends to chip and peel, ruining the effect surprisingly quickly.
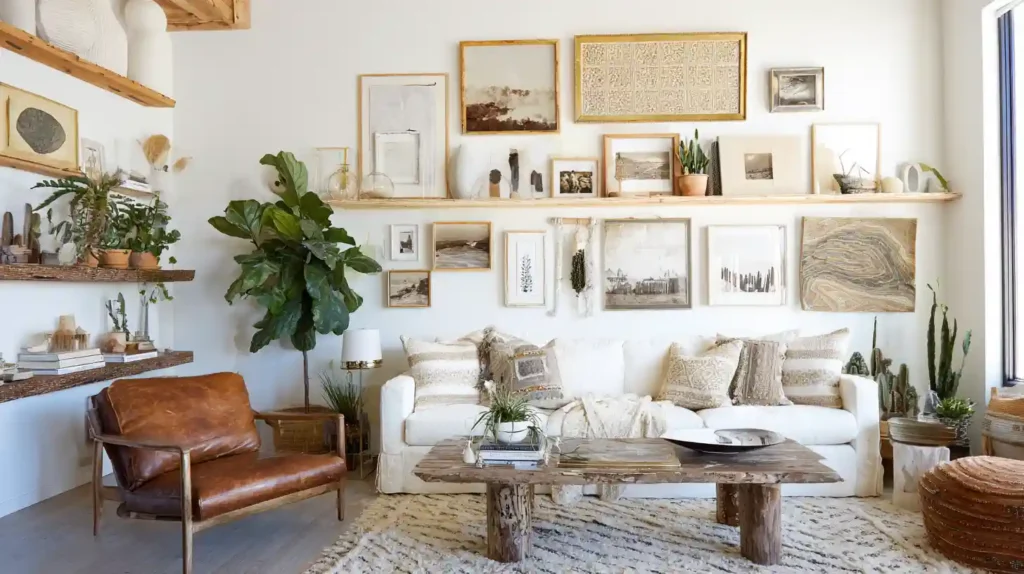
12. Create a Curated Picture Ledge Wall
A picture ledge is much easier to live with than a permanently arranged gallery wall.
Install one or two narrow ledges and layer framed prints, photographs, small canvases, and a few decorative objects against the wall.
The beauty is in the imperfection.
Don't make every frame identical. Instead, repeat one element—perhaps black frames, warm wood, or a common color—to connect everything visually.
IKEA's MOSSLANDA ledges illustrate why this approach works: the 55 cm version is only 12 cm deep and rated for up to 5 kg, while the longer 115 cm version carries up to 7.5 kg. Those specifications make the ledges suitable for lightweight art displays when properly secured, but they aren't a substitute for checking your wall type and fasteners.
The Secret Isn't the DIY. It's the Finish.
Here's where many inexpensive projects go wrong.
People focus on the idea but rush the last 10 percent.
Uneven caulk lines. Visible screw heads. Crooked frames. Paint on the hardware. Shelves that aren't level.
Those tiny flaws are disproportionately noticeable.
Before calling a project finished, stand across the room and look at it from the doorway. Then look again under evening lighting. Natural daylight can hide imperfections that become obvious beneath warm lamps.
Room design also benefits from restraint. Room Trends' recent coverage emphasizes avoiding overcrowding and allowing furniture and decorative elements enough breathing room rather than filling every available surface.
A useful test is simple: remove one thing.
If the room looks better, you had too much.
A quick high-end formula
Design move | Cheap-looking approach | More polished approach |
|---|---|---|
Artwork | Several tiny prints | One appropriately scaled piece |
Hardware | Mixed random finishes | One repeated finish |
Shelving | Unstyled storage | Layered, curated display |
Curtains | Short and narrow | High, wide, floor-length |
Wall trim | Thick and ornate | Slim and proportional |
Accessories | Many unrelated objects | Fewer, larger pieces |
Color | Many competing shades | Restrained, connected palette |
FAQ
What is the easiest DIY project that makes a home look expensive?
Changing cabinet hardware is probably the quickest. Framing a large mirror or adding picture-frame molding creates a bigger visual transformation but requires more preparation.
How can I make inexpensive furniture look high-end?
Focus on preparation, consistent paint, better hardware, and proportions. A basic dresser with carefully applied paint and substantial hardware can look more custom than an expensive piece with poor styling.
What DIY decor works best in a small room?
Prioritize vertical elements: tall curtains, framed mirrors, picture ledges, narrow shelving, and appropriately scaled artwork. These add visual interest without consuming much floor space.
Is wall molding still fashionable in 2026?
Yes, but the strongest approach is restrained rather than overly ornate. Simple geometric molding works across contemporary, transitional, and traditional interiors, while oversized decorative profiles can overwhelm rooms with lower ceilings.
How do I make DIY decor look less homemade?
Spend more time on measuring, surface preparation, alignment, caulking, sanding, and finishing. The expensive appearance usually comes from clean execution—not expensive materials.
Start With One Wall
Don't try all 12 projects in a weekend.
Pick the part of your home that currently bothers you most. A blank wall? Start with molding or oversized art. A tired kitchen? Change the hardware. A flat living room? Work on lighting, curtains, or a framed TV wall.
Then stop before the room becomes crowded.
The goal isn't to make your home look expensive. It’s to make every inexpensive choice look deliberate. That small distinction is what turns a collection of DIY projects into a room that actually feels designed.
DIY home decor
room decor ideas
home decor projects
budget room makeover
luxury DIY decor
Found this helpful? Share it!