DIY Moss Wall Art Tutorial (Bio-Luxe Home Trend 2026)
324 views
Introduction: Nature Meets Luxury in 2026 Interiors
In 2026, home design is no longer just about aesthetics—it is about experience, wellness, and sustainability. One of the most talked-about movements shaping interiors right now is the Bio-Luxe trend, a concept that blends natural elements with refined, modern living. At the center of this trend is moss wall art, a design feature that transforms plain walls into calming, nature-inspired focal points.
Recent global design movements and even fashion events have highlighted moss as a key material, reflecting a growing desire to reconnect with nature in everyday life. This shift is deeply connected to biophilic design, which emphasizes bringing natural textures and greenery indoors to improve well-being and mood.
Unlike traditional houseplants, moss wall art offers something unique: it delivers the beauty of greenery without the effort of maintenance. Preserved moss requires no watering, sunlight, or trimming, yet it remains lush and vibrant for years.
This article will guide you step-by-step through creating your own DIY moss wall art while also explaining why it has become one of the most influential home decor trends of 2026.
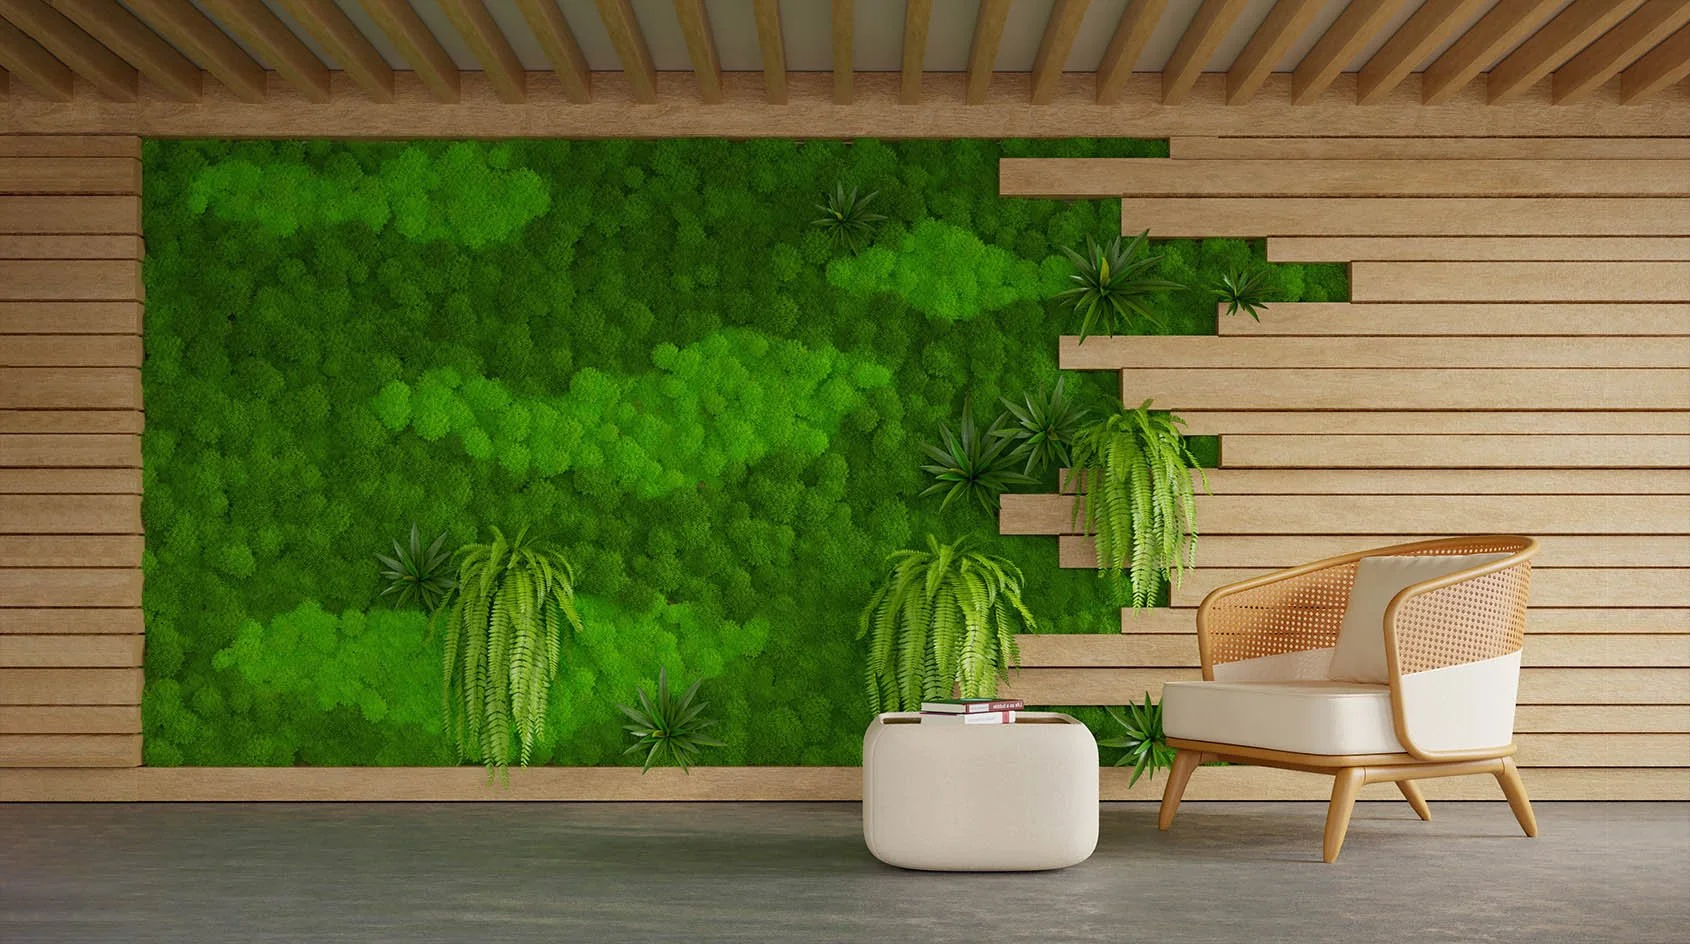
What Is Moss Wall Art?
Before diving into the tutorial, it is important to understand what moss wall art actually is.
Moss wall art is created using real moss that has been preserved through a natural process. This preservation keeps the moss soft, colorful, and long-lasting without requiring any care. Unlike living plant walls, moss does not grow or change—it simply stays as it is, making it ideal for interior decoration.
In modern homes, moss wall art can be used in several ways:
As framed artwork
As a full wall installation
As decorative panels or geometric designs
Because it does not require sunlight, moss can be placed anywhere—even in rooms with no windows.
Why Moss Wall Art Is Trending in 2026
The popularity of moss wall art is not random. It is driven by several major shifts in how people design and experience their living spaces.
1. The Rise of Biophilic Design
People are spending more time indoors than ever, and designers are responding by incorporating natural elements into interiors. Moss provides a simple way to create a connection with nature, which can reduce stress and improve mood.
2. Maintenance-Free Greenery
One of the biggest advantages of moss is that it requires no care. Unlike traditional plants, it does not need watering, sunlight, or pruning, making it perfect for busy lifestyles.
3. Acoustic and Comfort Benefits
Moss has natural sound-absorbing qualities, helping reduce echo and noise in spaces such as living rooms, offices, and studios.
4. Sustainable and Eco-Friendly Appeal
As sustainability becomes more important, moss is valued for its long lifespan and minimal environmental impact compared to artificial decor.
5. Aesthetic Depth and Texture
Unlike flat wall art, moss adds a three-dimensional, organic texture that enhances the visual depth of a room.
Materials You Will Need
Creating DIY moss wall art is surprisingly simple, but choosing the right materials is essential for a high-quality result.
You will need:
A wooden or metal frame (any size you prefer)
Preserved moss (such as reindeer moss or mood moss)
Plywood or backing board
Strong adhesive or hot glue
Gloves (optional, for handling moss)
Decorative elements (optional, such as stones, bark, or wood pieces)
The type of moss you choose will affect the final look. Reindeer moss creates a more textured, modern appearance, while mood moss gives a softer, more natural landscape effect.
Step-by-Step DIY Moss Wall Art Tutorial
Step 1: Prepare Your Frame
Start by selecting a frame that suits your space. Remove any glass or backing if necessary, and ensure the surface is clean and dry.
Step 2: Attach the Backing Board
Secure a plywood or foam board to the back of the frame. This will act as the base where the moss will be attached.
Step 3: Plan Your Design
Before gluing anything, arrange the moss on the board to visualize your design. You can create patterns, gradients, or a completely natural, random layout.
Step 4: Apply Adhesive
Using strong glue, begin attaching the moss to the board. Work in small sections to ensure the glue does not dry before placing the moss.
Step 5: Layer for Depth
For a more professional look, layer different types of moss and textures. This creates a three-dimensional effect that makes the artwork stand out.
Step 6: Add Decorative Elements
If desired, include natural elements like bark, stones, or dried branches to enhance the design.
Step 7: Let It Set
Allow the glue to dry completely. This may take several hours depending on the adhesive used.
Step 8: Hang and Enjoy
Once finished, hang your moss wall art in your desired location. Since it does not require sunlight, you can place it anywhere.
Design Ideas to Elevate Your Moss Wall Art
To achieve a Bio-Luxe aesthetic, consider these design approaches:
Minimalist Moss Frame
Use a simple frame with uniform moss for a clean, modern look.
Geometric Moss Art
Create patterns such as circles, lines, or abstract shapes for a contemporary style.
Mixed Texture Panels
Combine different types of moss with wood or stone elements for added depth.
Statement Wall Installation
Instead of a single frame, create multiple panels or cover a larger section of the wall for a dramatic effect.
Where to Place Moss Wall Art
Moss wall art is versatile and can enhance many areas of a home:
Living rooms: As a focal point above a sofa
Bedrooms: To create a calming atmosphere
Home offices: To improve focus and reduce stress
Entryways: To make a strong first impression
Because moss does not need light, it works well in hallways and windowless spaces where traditional plants cannot thrive.
Maintenance and Care Tips
One of the biggest advantages of moss wall art is how easy it is to maintain.
You do not need to water or trim it. In fact, adding water can damage preserved moss. The only care required is:
Keep it away from direct sunlight
Avoid high humidity areas like bathrooms
Occasionally dust it gently if needed
With proper placement, moss wall art can last for many years while maintaining its color and texture.
Common Mistakes to Avoid
Even though this is a simple DIY project, there are a few mistakes to watch out for:
Using live moss instead of preserved moss
Applying too much glue, which can damage the texture
Not planning the design beforehand
Placing it in areas with excessive moisture
Avoiding these mistakes will help you achieve a professional-looking result.
The Future of Moss in Interior Design
The use of moss in design is expected to grow even further beyond 2026. As sustainability and wellness continue to influence interior design, materials like moss will play a bigger role in shaping how spaces look and feel.
From homes to offices and even commercial spaces, moss is being used not just as decoration but as a way to create environments that feel calm, natural, and connected to the outdoors.
Conclusion
DIY moss wall art is more than just a creative project—it is a reflection of a larger shift in how we design our living spaces. The Bio-Luxe trend of 2026 emphasizes the importance of combining nature with modern living, and moss wall art captures this idea perfectly.
By following the steps in this tutorial, you can create a beautiful, low-maintenance piece of art that enhances your home while also supporting a healthier and more relaxing environment.
Whether you choose a simple frame or a bold statement wall, moss wall art allows you to bring a piece of nature indoors—effortlessly and elegantly.
DIY moss wall art
bio-luxe home trend
moss wall decor
room decor ideas
natural wall art
Found this helpful? Share it!